Actions and hooks
To integrate the Product Badges plugin using the actions and hooks integration option, navigate the plugin settings page.
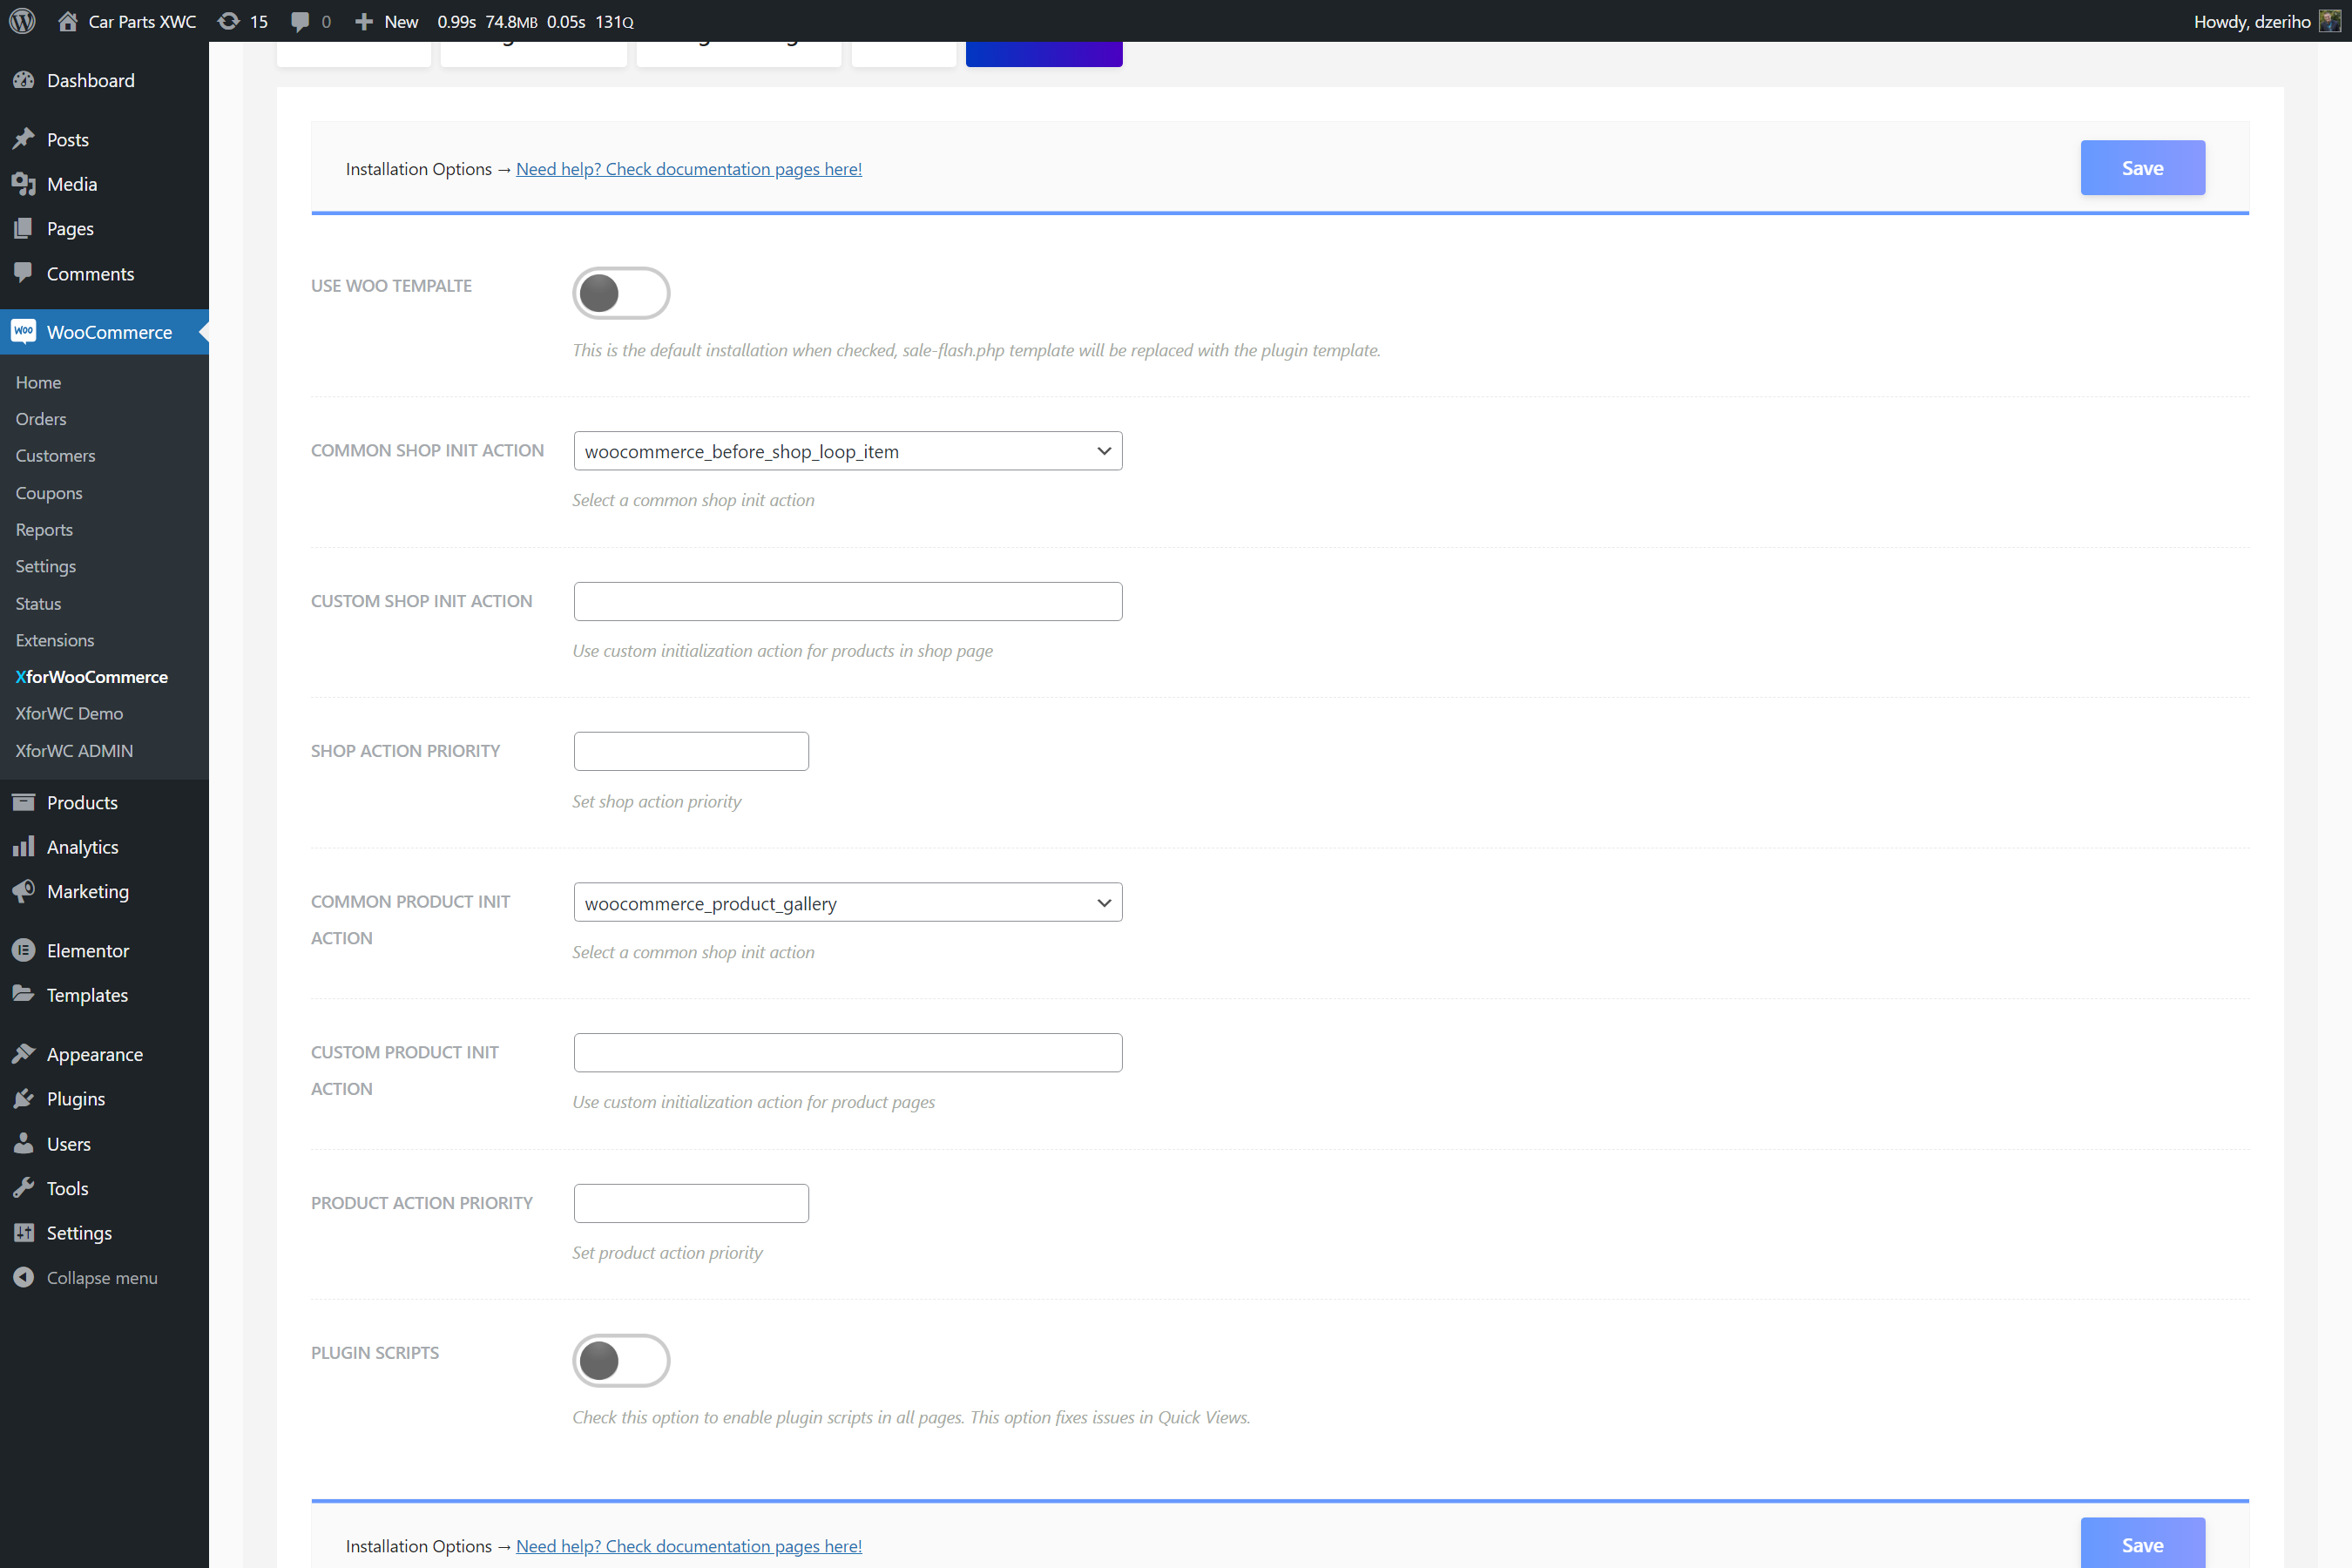
- If you use XforWooCommerce navigate
WooCommerce > XforWooCommerce, enter theProduct Badgesdashboard. Are you using the stand-alone plugin? NavigateWooCommerce > Settings > Product Badgesto visit the plugin settings page - Once there, click the
Installationtab - The
Use Woo Templateoption should be off, as we don't want to replace the template, but just addon new badges - From the
Shop Init Actionselect box choose a default action/hook. The default action used by almost every theme iswoocommerce_before_shop_loop_item - From the
Product Page Init Actionselect box choose a default action/hook. The default action used by almost every theme iswoocommerce_before_single_product_summary - If you'd use your own custom action, use the
Custom Shop Init ActionandCustom Product Page Init Actionoptions respectively and enter the action name too hook the plugin template - Click the
Savebutton to keep your settings
Action/hook is a place in code that executes as the website renders. We can integrate a plugin this way by hooking it onto an appropriate action/place in the web page.
These actions and hooks are mostly default and used in all themes, so this isn't something to hard to setup. There are problems, as all themes are different, and those will be explained in the next chapter.
Hooked actions have priorities, so you can use those options to fine tune the integration.
The badges should now be integrated with the actions and hooks option. This option works for both shop and product pages. To see if the things are working correctly, we need to assign some badges and test things out.
To learn how to do this navigate the Create your first badge.
